Problem: My Fabia’s temperature indicator light started flashing and beeping at me a few minutes after the engine was started, each time I used the car. The coolant level was fine, and the car seemed to get up to temperature quickly and stay there, never overheating. A quick search of the Briskoda forum revealed that this is a common fault, caused by faulty terminals and/or electrodes in the expansion tank vessel.
Solution: On the VRS models, and possibly others, the electrodes that measure coolant level cannot be replaced or cleaned, so a complete expansion tank replacement is needed. Thankfully these are cheap (about a tenner) and easy to fit. Here is a fitting guide, with photos where necessary:
1) Unhook the loom carrier from the two fixing holding the tank in place.
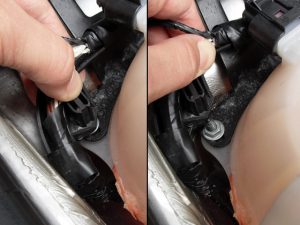
2) Now disconnect the terminal on the rear of the expansion tank that connects the coolant level sensor to the loom. There are clips on the top AND the bottom of this clip. Don’t force it, if it doesn’t come off easily it’s likely because the lower clip is not being squeezed firmly enough.
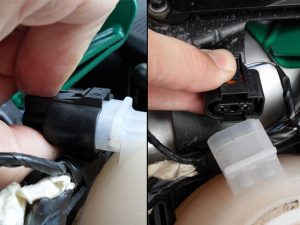
3) Remove the overflow pipe (or maybe it’s a return pipe) at the top rear of the tank. This is most easily done with parallel pliers or mole-grips, by squeezing the sprung hose clamp, then easing the pipe off. Make sure you don’t lose the hose clamp in the engine bay. I found it best to tuck the pipe backwards under the strut brace to keep it out of the way.
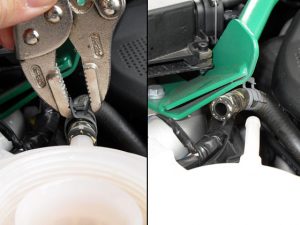
4) Unclip the vacuum pipes from the vacuum thingy (if you know what this ‘thingy’ is, please leave a comment below telling me, and I’ll put the right name in). The two sprung clips are easy to press by hand as shown in the photo. You might hear a little ‘hiss’ (i did) when you do this. Doesn’t seem to be a problem.
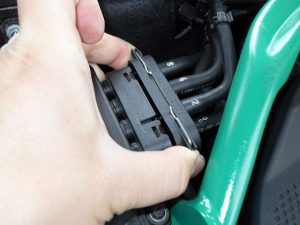
5) Remove the two front nuts that hold the vacuum thingy frame in. The plastic loom support will probably be right in your way for this. If you’ve completely unhooked it (see step 1) you should be able to manhandle the wiring backwards for the right-hand nut, and pulled right forward for the left-hand nut. The nuts have captive washers which is nice, but be sure not to let them drop in the engine bay!
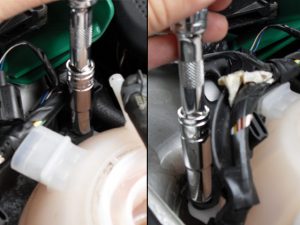
6) Remove the 3rd frame bolt right by the bulkhead. The angle can be a bit tricky and I found that an extension was needed with the socket set.
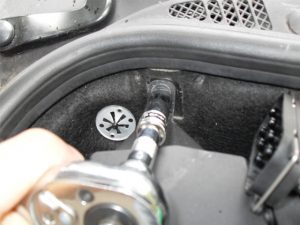
7) Now to get the frame out, you will need to pull the loom wiring and plastic support thing right out of the way forward. It hooks over the expansion tank socket quite nicely as you can see in the photo. Lift the frame gently off the two front fixings, then pull it towards the front of the car to get the frame off the rear fixing.
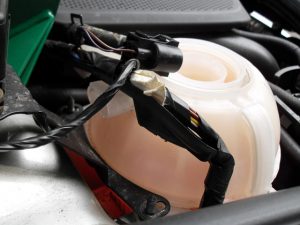
8) Lift the frame completely out of the way. I found that if you turn it 90 degrees it sits between the suspension turret and the rubber bonnet seal quite well.
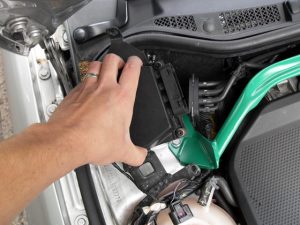
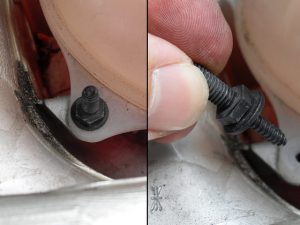
9) Now remove the 2 fixings that hold the tank in. As shown in the photo below, the fixing is a bolt, a captive washer, and a screw all in one. A 10mm socket removes the fixing. Once both are removed, the tank will stay where it is until you lift it out.
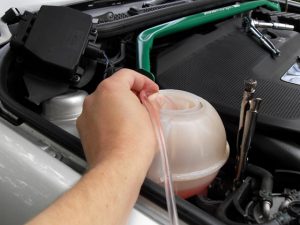
10) Now the tank is ready to come out, clamp the bottom hose near as near to the tank as possible (see pic for step 11) with a pair of mole-grips.
Caution: if you clamp it too right you risk damaging the hose, especially with the mechanical advantage that mole-grips give. It’s soft hose, so only needs to be squeezed a bit.
Then siphon the tank into a bottle or something with some tube. I’m not sure how corrosive G12 coolant is, but um.. don’t drink it.. or get it on your paintwork.. or eyes.. or sensitive bits.
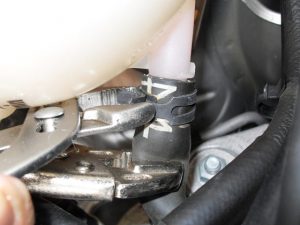
11) Now that the tank is empty (more or less) you can use some pliers (parallel or adjustable ones are best for this) to loosen the sprung hose clamp with one hand, while pulling the tank free with the other hand. I found that the hose came off easily once the sprung clamp was very loose. If the hose doesn’t want to come free, it might be best to use a second pair of mole-grips on the sprung clamp, thus leaving two hands free to wrestle the tank and hose apart.
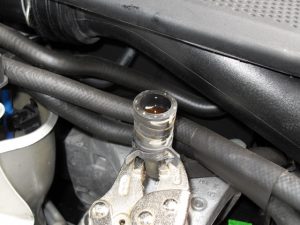
12) If this is done carefully, there should be no spillage. The tiny amount of coolant left in the neck of the tank after it was siphoned should stay in the up-turned hose.
13) Now, fit the new expansion tank by reversing this process completely. Note: If G12 coolant is already in the system, G12 must be used when the new tank is filled up. It’s best to use new coolant, and the OEM pink stuff is readily available for about £5-10 from any VAG dealer.
Please let me know if this post was useful with a click!

 - +16 thumb, 18 overall.
Very clear instructions. Exactly what I needed. Managed to change the tank in about 30 minutes (and I am by no means an expert!). Thanks very much.
top advice mate being trying to sort this problem for a week cant believe how easy a fix thanks
Hi – hopefully this may fix a similar problem I am having. However, in addition to this light flashing and beeping upon start up (only occasionally, strangely), at certain motorway speeds when opening the throttle (and especially when going up hill on a motorway)the tempertaure guage starts to climb until in the red, at which point thsi beeps as you would hope. However, once I ease off or go back to a level piece of road, the guage settles back to normal. Do you have any idea if this could be down to the same issue (i.e. have you experienced the same? If not, any idea what it could be? Thanks!
Hi Anthony,
Yea that sounds like the problem I had, and eventually because I didn’t get it looked at, the head cracked and I sold the car on eBay as I didn’t want the expense of getting it fixed. In my case the problem got worse and worse and had I acted quicker I might have caught it when it was just a HG failure. I suggest you get it checked asap!
Ben
I have exactly the same, however have noticed coolant all around the header tank cap and the level is decreasing. I am going to replace the header tank as the warning light keeps coming on, so will keep an eye on the temperature gauge to see if it has fixed that. How much does a head gasket change cost?
Great feature and easy to follow step-by-step guide. Just replace my Fabia 1.4 expansion tank using this and all was straightforwards. Thanks very much!
Amazing! Bought car with this fault and Garage has been trying to help since but thought next step was checking all the wiring after changing sensor didn’t work but found this and for the price it is definetely worth trying yourself first …seems to have worked light did not come on today yippeee ! Thank you so much for this guide sooo helpful slight differences for 1.4 but easy following tips from this. : )
Got similar problem as described above – beep and flashing coolant light after initial start up – does not repeat after re-start when engine warmed up. Coolant expansion tank changed problem disappeared until recently – started again after heavy frost. Garage(s) cannot determine problem – tank replaced under warranty was not solution. No loss of coolant, temperature gauge settles at mid point when warmed up, car appears to be running well (just had new clutch fitted). No sign of water in oil, and no excessive build up of gunge on underside of oil filler cap. New temperature sensor and radiator also fitted. Could this be an ECU problem – possible needs recalibrating? Could faulty thermostat be part of the scenario?
This worked perfectly, thank you for a great guide
I have a similar problem I have changed the tank but the problem remains ????
Check the cooling fan relay