Problem: Both rubber diaphragms under my Triumph GT6 (mk1) seats were shot, no longer able to support the seat base cushion squab thing.
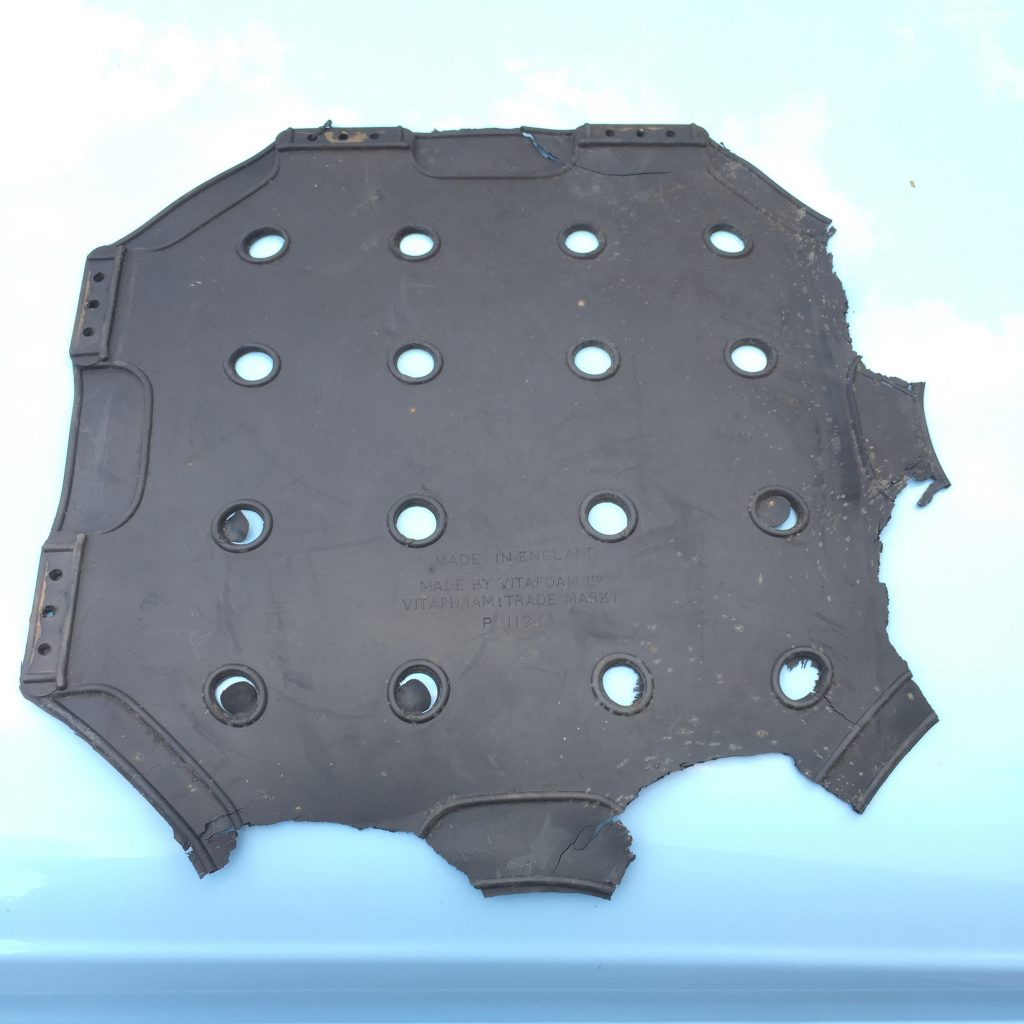
Solution: Whilst these diaphragms are available (well, Mini ones are and they look pretty similar) I don’t want to spend £70 on a pair of new ones. Wife had an old summer wetsuit she didn’t want which looked perfect!
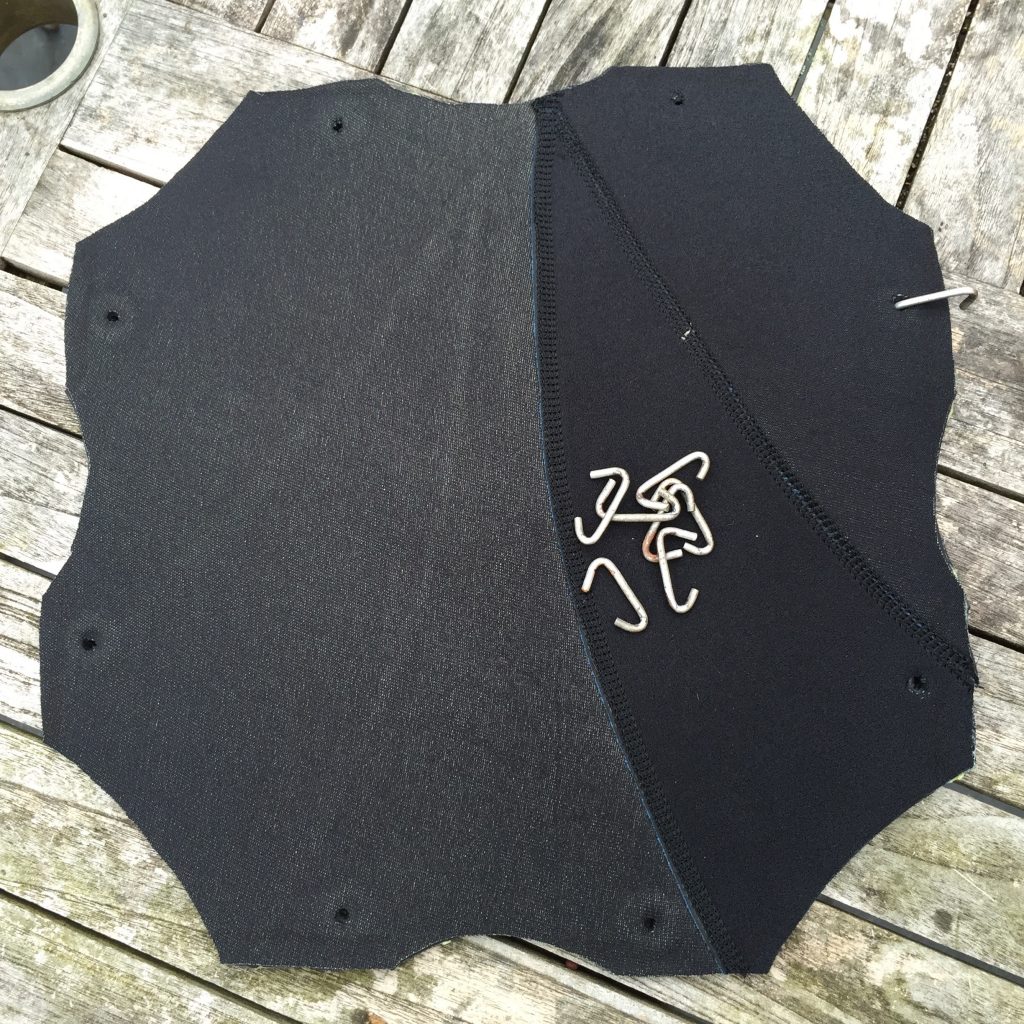
Step 1: Cut the wetsuit into several flat pieces (I advise cutting along the inner thigh; leg sections are quite wide when opened-out) then trace roughly around the old diaphragm with a sharpie. Thin neoprene is more stretchy than the original rubber so I cut two pieces to glue together, and also cut about 10mm inside the drawn outline to try and accommodate for the extra tension needed.
Step 2: Using a contact adhesive, spread a thin covering of glue on both pieces and let it become touch-dry. Then press both pieces together and place some weight on the centre of the two glued-together pieces BUT don’t apply weight to the eight ‘lugs’ at the edges where the holes will go. A large log worked here, but you might find a plant pot more suitable. Leave for a few hours, but not too long because…
Step 3: gently peel the two sides of each of the eight lugs apart enough to insert a washer. If the previous glue application has been left too long to set, a scalpel might need to be used to encourage the sides to part. Once both sides are pulled apart and – neoprene being fairly floppy as it is – gaping open, apply glue to both inner sides again, and both sides of a washer. Let them air dry.
Step 4: Place the washer in the sort-of pocket that’s been created by the two sides of the lug, and make sure it’s in deep enough to allow some neoprene to be stuck directly together all the way around it. Then when done for all eight lugs, DO apply weight to the whole surface, maybe with two gurt sheets of wood. Leave to set nicely for 24h.
Step 5: Punch the holes out the middle of the washers. I literally used a 5mm parallel punch into a piece of hardwood.
Sorry for the lack of pictures, but at this stage the new diaphragm looks like this:
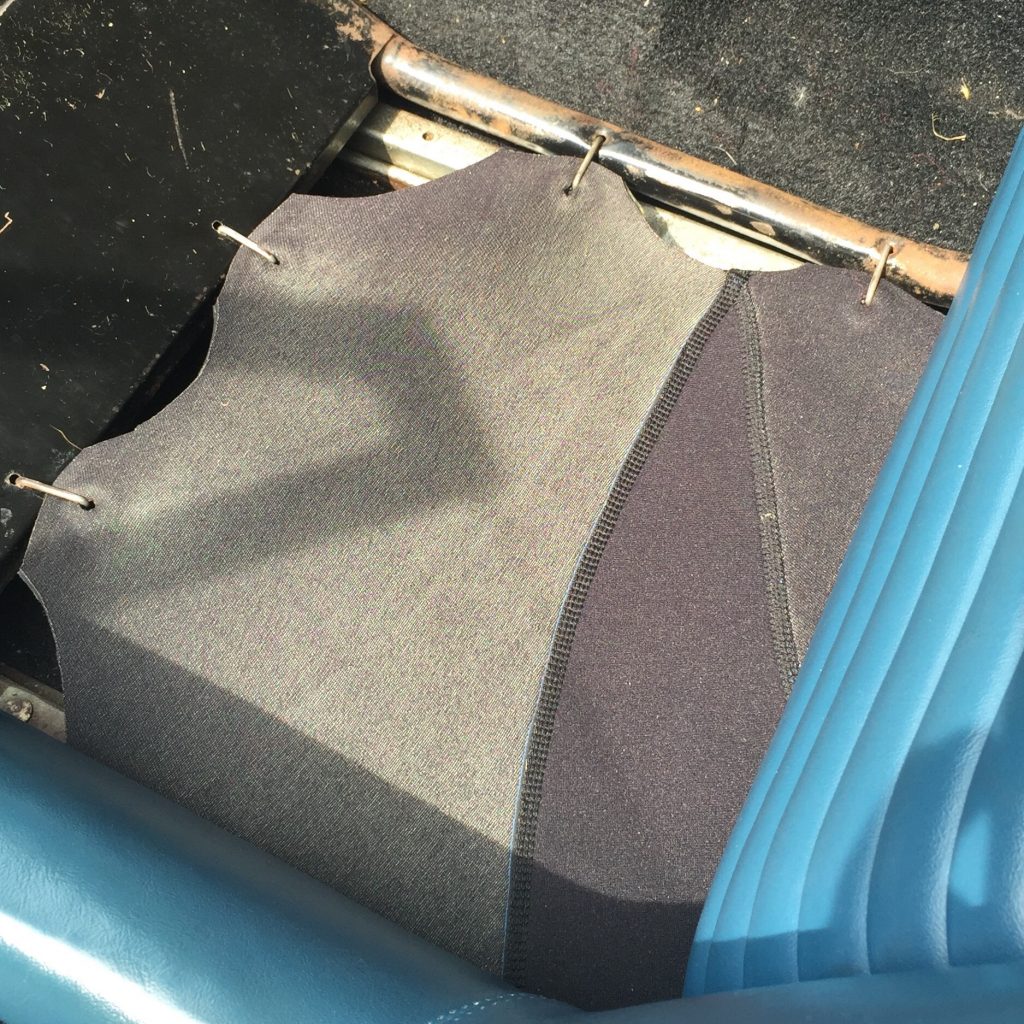
Step 6: Fit it!
Please let me know if this post was useful with a click!

 – +4 thumb, 4 overall.
![]() Loading…
Loading…
Leave a Reply